


Every solids-removal system should have enough shale shakers to process 100% of the drilling-fluid circulating rate. In all cases, consult the owner’s manual for correct installation, operation, and maintenance 154 Drilling Fluids Processing Handbook procedures. If an owner’s manual is not available, the following general guidelines may be helpful in observing proper procedures.
1 Shale Shaker Installation
1. Low places in the flowline will trap cuttings. Flowline angle should be such that settling of solids does not occur, that is, a 1-inch drop for every 10 feet of flowline seems to be a good rule of thumb.
2. When a back tank (possum belly), is used, the flowline should enter at the bottom to prevent solids from settling and building up. If the flowline enters over the top, it should be extended to within one pipe diameter of the flowline from the bottom.
3. Rig up with sufficient space and approved walkways around the shaker(s) to permit easy service and maintenance.


4. Branched tees (Figure 7.21) should be avoided. Solids preferentially travel in a straight path, resulting in uneven solids distribution to the shale shakers.
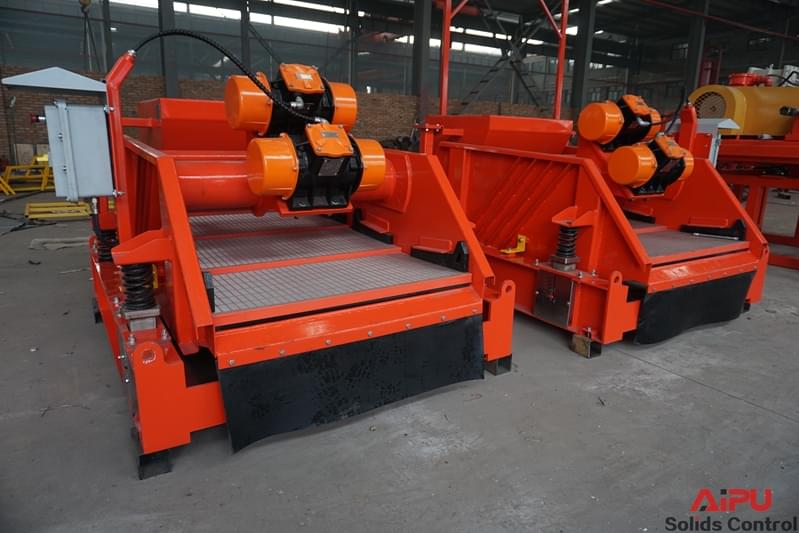
5. Ensure equal fluid and solids distribution when more than one shaker is used, as shown in Figure 7.22.
6. The options shown in Figures 7.22 and 7.23 are better than the distribution system shown in Figure 7.21.
7. An optional top delivery (Figure 7.23) prevents cuttings settling in the back tank.
8. A cement bypass that discharges outside the active system is desirable.
9. Mount and operate the shale shaker where it is level. Both the solids and fluid limits will be reduced if this rule is not followed.
10. Motors and starters should be explosion-proof. Local electrical codes must be met. Be sure that starter heaters are the proper size.
11. Provide the proper electrical voltage and frequency. Low line voltages reduce the life of the electrical system. Low frequency reduces the motion and lowers the capacity of the shale shaker.
12. Check for correct motor rotation.
13. Check for correct motion of the shale shaker deck.
14. Check drive belts for proper tension according to manufacturer’s instructions.
15. Screens should be installed according to manufacturer’s instructions.
16. Provide a wash-down system for cleaning.
17. Water-spray bars, if installed, should provide only a mist of water —not a stream.


2 Shale Shaker Operation
1. For double-deck shale shakers, run a coarser-mesh shaker screen on the top deck and a finer-mesh shaker screen on the bottom. The coarser shaker screen should be at least two API sizes coarser than the finer-mesh shaker screen. Watch for a torn bottom screen. During normal drilling operations, cover at least 75–80% of the bottom screen with drilling fluid to maximize utilization of available screen area. Properly designed flowback pans may improve shaker performance. (Gumbo shakers mounted above as an integral part of linear shale shakers are not called double-deck shale shakers, although the operation guidelines above still apply.)
2. For single-deck shale shakers with multiple screens on the deck, try to run screens all of the same mesh. If coarser screens are necessary to prevent drilling fluid loss, run the finer screens closest to the possum belly. All screens should have approximately the same-size openings. For example, use a combination of MG API 100 (140 microns) þ MG API 80 (177 microns), but not MG API 100 (140 microns) þ MG API 50 (279 microns). Under normal drilling conditions, cover at least 75–80% of the screen area with drilling fluid to properly utilize the screen surface area.
3. Water-spray bars (mist only) may be used for sticky clay to aid conveyance that reduces whole drilling fluid loss. High-pressure washers should not be used on the screen(s) while they are circulating, as solids will be dispersed and forced through the screen openings. Water-spray bars are not recommended for weighted fluids or oilbased NAFs.
4. Do not bypass the shale shaker screens or operate with torn screens; these are the main causes of plugged hydrocyclones. This results in a build-up of drilled solids in the drilling fluid. Dumping the back tank into the pits (to clean the screen or for whatever reason) is a form of bypassing the shale shaker and should not be done.
5. All drilling fluids that have not been processed by solids-removal equipment and are intended to be added to the active system should be screened by the shale shakers to remove undesirable solids. This specifically includes drilling fluid delivered to a location from remote sources.
6. Do not dump the back tank, or possum belly into the system before trips. These solids do not settle and will plug hydrocyclones downstream.
3 Shale Shaker Maintenance
1. For improved screen life with nontensioned screens, make certain that the components of the screen tensioning system, including any rubber supports, nuts, bolts, springs, etc., are in place and in good shape. Install screens according to the manufacturer’s recommended installation procedure.
2. For improved life pretensioned screens, ensure the deck rubber support seals are not worn or missing.
3. Lubricate and maintain the unit according to the manufacturer’s instructions. (Some units are self-lubricating and should not be “relubricated”’).
4. With screens that are not pretensioned, check the tension of screens at 1, 3, and 8 hours after installation and hourly thereafter.
5. Check the tension of and adjust drive belts according to the manufacturer’s instructions.
6. If only one deck of a multiple-deck shaker is used, be sure that other tension rails are secured.
7. Wash screens at the beginning of a trip so as not to allow fluid to dry on them. We repeat: Do not dump the possum belly into the active system or the sand trap below the shaker. The result will be plugging of hydrocyclones downstream and/or an increase in drilled-solids concentration in the drilling fluid.
8. Check the condition of vibration isolator members and screen support rubbers and replace them if they show signs of deterioration or excessive wear.
9. Check the fluid bypass valve and other places for leaks around the shaker screens.
10. Remove drilling-fluid buildup from the vibrating bed, vibrators, and motors. Caution: Do not spray electrical equipment or motors with oil or water.
11. Make certain that no hose, cables, etc., are in contact with the vibrating bed.
4 Shale Shaker Operating Guidelines
Shale shakers should run continuously while circulating. Cuttings cannot be removed if the shaker is not in motion
1. Drilling fluid should cover most of the screen. If the drilling fluid covers only one fourth or one third of the screen, the screen is too coarse.
2. A screen with a hole in it should be repaired or replaced at once. Holes in panel screens can be plugged. Install screens according to manufacturer’s recommended installation procedures. Cuttings are not removed from the drilling fluid flowing through the hole.
3. Shaker screen replacements should be made as quickly as possible. This will decrease the amount of cuttings remaining in the drilling fluid because the shale shaker is not running.
4. Locate and arrange tools and screens before starting to make the replacement. If possible, get help.
5. If possible, change the screen during a connection. In critical situations, the driller may want to stop (or slow) the pumps and stop drilling while the screen is being replaced.
6. For improved screen life with nonpretensioned screens, make certain the components of the screen tensioning system, including any rubber supports, nuts, bolts, springs, etc. are in place and in good shape.
7. Check condition of vibration isolators members and screen support rubbers and replace if they show signs of deterioration or wear.
8. Water should not be added in the possum belly (or back tank) or onto the shale shaker screen. Water should be added downstream.
9. Except in cases of lost circulation, the shale shaker should not be bypassed, even for a short time.
10. Wash screen(s) at the beginning of a trip so fluid will not dry on the screen(s).
The possum belly (or back tank), should not be dumped into the sand trap or mud tank system just before making a trip. If this is done, cuttings will move down the tank system and plug desilters as the next drill bit starts drilling.
